 written by
Our Senior Product Specialist, Mike Floyd, explains how to calibrate an SG52 for granular applications in the video below. The same principles he discusses can be applied to our smaller units, also.
After you’ve watched the video, use this handy chart to help you calibrate your Steel Green.
Transcript:
Hey guys, it’s Mike here from Steel Green Manufacturing. And today, we’re going to talk about granular calibration on your equipment.
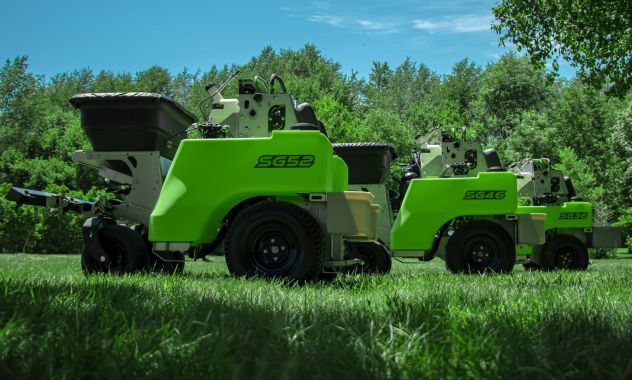
I’ve brought out here today an SG52. And we’re going to go over that with this machine. And the same principles that I’m going to talk about can also be applied to our other smaller chassis. To do this, there’s some tools here I brought along with me to calibrate the machine. We have a scale, measuring bin, a bucket, a measuring wheel, and some cones to measure off our distance and also our spread width of the machine. We’re going to need that information to complete the calibration. So let’s get started.
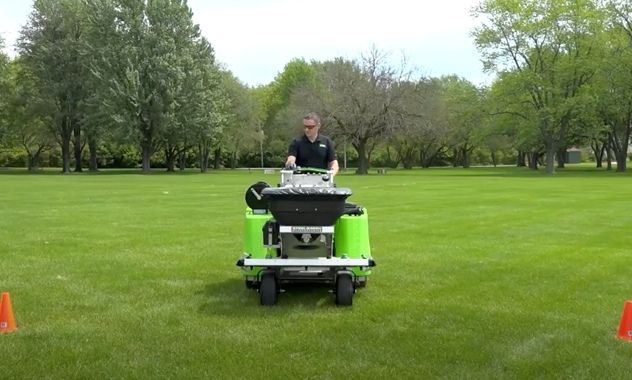
Alright, guys, so the first step we’re going to need to do in order to calibrate your machine is we’re going to need to get some product and put a bag in the hopper. I’ve already done so. I’ve got a 50-pound bag in the hopper already. And now we need to measure out how wide we want this machine to spread. So what I’ve done is I’ve taken a measuring wheel here, and I started from the center of the machine, and I went eight feet to the left and eight feet to the right and placed some cones. And then I went ahead and double-check that distance across them, which is 16 feet. Once you get those in place, now we can hop on the machine and crank it up. Make sure your machine is warmed up, and you’re running the engine at full throttle. You know, which is going to be the RPM that you’re going to be using out there in the field. That way the hydraulic motor in the hopper is running at the correct speed as it will be when you’re actually applying the product.
So, let’s go ahead and hop on the machine, fire it up, give this thing a test and see how wide we’re spreading, and see if we need to adjust our speed or not to get it closer in or wider out to meet these cones.
Alright, so to get your machine’s spread width calibrated to the width that you want it to be, first thing you’re going to want to do is start your machine and then rev it up to full throttle. Just like you’re going to be running it out there in the field when you’re actually applying the product. Now, this knob here on your dashboard is the hopper control knob. And as you can see from the decal, as you turn it to the left, it’s going to increase the width of your spread, and as you turn it to the right, it’s going to skinny that up and decrease the width.
Say if you had your machine where it was already turned all the way down, off. So where your impeller is not spinning at all. A good rule of thumb would be to just start off by taking it one rotation out. And then we’re going to be starting our spread watching it and then just turning it up to where we actually get it to the 16 feet or whatever distance you’re going for. In our case, it turned out that it was just about less than a quarter turn to get us to 16 feet. And then now we’re ready for the next step.
Okay, so now we have our machine spreading to 16 foot wide like we want, we need to mark off a 1000 square foot area at that 16 foot wide spread width. So, we can time ourselves to see how long it takes for us to travel over a 1000 square foot area. So, to do that, I’m going to use my cones and a measuring wheel and I’m going to make a track here that’s 62 and a half feet long, which is the 1000 square foot area divided by our 60-foot spread. We’re not going to be spreading; we’re not concerned about that right now. Next, we will talk about the dial settings number. For right now, we’re just going to get our time.
Okay, so I got that marked off. Now, we can have somebody help us and time us going down this track at five miles an hour and see how long it takes. Okay, so now we need to talk about what we recorded when we ran through that, that 62 and a half foot track there to see what kind of time it took us. So, we measured that and it took just a touch over eight and a half seconds, which if you do the math, at five miles an hour, you should be traveling seven and a third foot per second. So, that is right about where we should be. So that not only validates our speedometer on our machine, but you know we know based off the math that’s an appropriate time and we were doing what we should have been.
So, to figure out how much product we’re going to apply on that 1000 square foot area, all we need to do is get our dial on a setting to start off with. I’ve got mine on about a five and a half right now. I’m shooting for three and a half pounds per 1000 square feet. So, in order to do that, when I, when I take this impeller off, and we catch it for that period of time, the eight and a half seconds, we’ll start the machine, get it running, make sure that impeller is turning, but the actual impeller will not be on there. But we want that shaft turning just as you’re applicating on the lawn because there’s an agitator wire in there. That way the flow is going to be identical to when you’re actually out there on the yard. So we’ll run the machine full throttle, at the same rpm we were spreading 16 feet wide, and then we’ll catch the product here for eight and a half seconds into a bucket.
Now, when we’re done with that, we’re going to take it over to our scale, weigh it and see how much product we have. We’re not trying to catch the three and a half pounds because when you’re spreading granular product, you’re spreading it with 100% overlap. So, I’m going to be spreading all the way back to the middle of my last set of tire tracks. So, we’re actually going to be looking for half of that target rate. So three and a half pounds, we’re actually going to be meaning to catch one and three-quarter pounds in the bucket.
Okay, so in order to remove this impeller, so we can open the hopper door and catch our product and measure it, all we need to do is take this removable spinner clip, it’s reusable, squeezed up on it, unclip it from the shaft, pull that out and it drops right off.
So, now we have a wide-open area. We could sit a five-gallon bucket straight under here, and then open the hopper door for the period of time that we need to catch the product so we can weigh it and see how much product we’re putting out over that area.
Putting this back on is just as easy. So, you just get that back on there. Spin it till you find the hole in the plastic and cover itself. You can go ahead and start it in there. And then drop it down so you can see where the holes at. Get it back through. Then, you just squeeze up on this here and it locks it back around the shaft.
Okay, so I got my five-gallon bucket here. So, we’re going to place this under the machine. We’ll go over, remove this impeller with a clip like I showed you. Get that out of the way. Make sure that it’s centered. I got my dial setting on the five and a half, which is just the starting point. And then we’re going to go start the machine, get the spinner rod going, the agitator in the hopper, and I’ll have the door open for eight and a half seconds, then shut it and we’ll take the product in the bucket and go wait on the scale. Okay, so I’m over here at scale. I have a second thing here on the scale. I have a tear it out got some wind here today, which is just blowing on and causing the numbers you’re seeing to move around. So we’ll take the contents from the bucket here and dump that in and see what we weighed out. So our goal was going to be one in three-quarter pounds to get that three and a half pounds per 1000 rate.
So, we’ll see if we’re heavy or light here. So, we’re at two-point ten here, so we’re a little over. We’re going to throw that stuff right back into the hopper, reduce the dial number some and run it again for eight and a half seconds and bring back to the scales and see what we come up with.
Okay, so we came up a little heavy there on the first test. So, we’re going to reduce this dial setting from five and a half to just five and a quarter. So, a couple of clicks back. I don’t want to bring it down too far because it does make a decent adjustment. So, we’ll put this back under here, hop on, catch it at five and a quarter for eight and a half seconds and then weigh that and see for closer to our one and three-quarter goal.
Okay, so back over at our scale. We got our second container on the scale. The winds are making the scale act a little funny today but it’s all good. So, I’m going to take our bucket contents in the second session and see what we got.
All right, so here we are right around where we need to be 1.7879. 1.75 was our goal. So, one and three quarter pounds. Putting that down with 100% overlap is going to double that to our desired rate, which is three and a half pounds per 1000 square feet. And one of the things I really liked about this weighing method is it doesn’t matter the pearl size of the product because you’re going to adjust that door opening, and you’re going to catch the weight, which is what you’re after. And you’re going to be putting out the right amount of product over that 1000 square feet.
Okay, so now our machine is calibrated. We got our dial setting there at the five and a quarter. And I went ahead and reinstalled the impeller just like I showed you earlier. And this machine would be ready to use this product and apply it at three and a half pounds per 1000 like we want it to.
Okay, so just a little recap of what we just talked about today, the granular calibration of the SG52. The same principles we talked about can be applied to our smaller equipment as well. On this one, we had the 16-foot spread width and we were going to be doing and then we had our target rate of three and a half pounds per 1000 square feet. So, if you need to shrink that down to 10 feet, you’re just going to extend your distance. So, your time is going to be a little bit longer when you’re timing and catching the product in the hopper. So, if you just remember to get your spread width, get the distance it takes to cover 1000 square feet, time yourself, and then just start your dial on the hopper at a middle of the road setting, you know five or a little more, catch it for that timeframe and then adjust off of that until you get to your target rate. And it’s pretty easy. I really appreciate guys watching the video today. Feel free to check out our website at steelgreenmfg.com and also check us out on social media.